
Day 5: Configuring Documents and Workflows

If you’ve ever wondered what differentiates a smoothly operating construction business from one that constantly feels reactive, the answer often lies in their workflow management. While organizing paperwork might not sound exciting, it’s a critical aspect of maintaining an efficient operation.
As a JobTread consultant, I’ve worked with many contractors to streamline their workflows, and setting up your documents correctly in JobTread is key. In this post, we’ll walk through how to configure your JobTread documents and templates for maximum efficiency.
Understanding Documents in JobTread
In JobTread, "documents" encompass all the formal communications and records that facilitate your operations, such as estimates, invoices, bid requests, and agreements. These documents serve as the backbone of the system, enabling you to manage financial transactions, track project progress, and maintain clear communication across all stakeholders. These include:
- Estimates and proposals for clients
- Bid requests to vendors
- Invoices (sent or received)
- Purchase orders for vendor approvals
- Expense tracking and bills
- Design agreements
- Selection sheets for customer choices
In essence, documents are the primary way work gets tracked and accomplished in JobTread. Whether you’re finalizing a proposal, collecting payments, or managing expenses, you'll use a document.
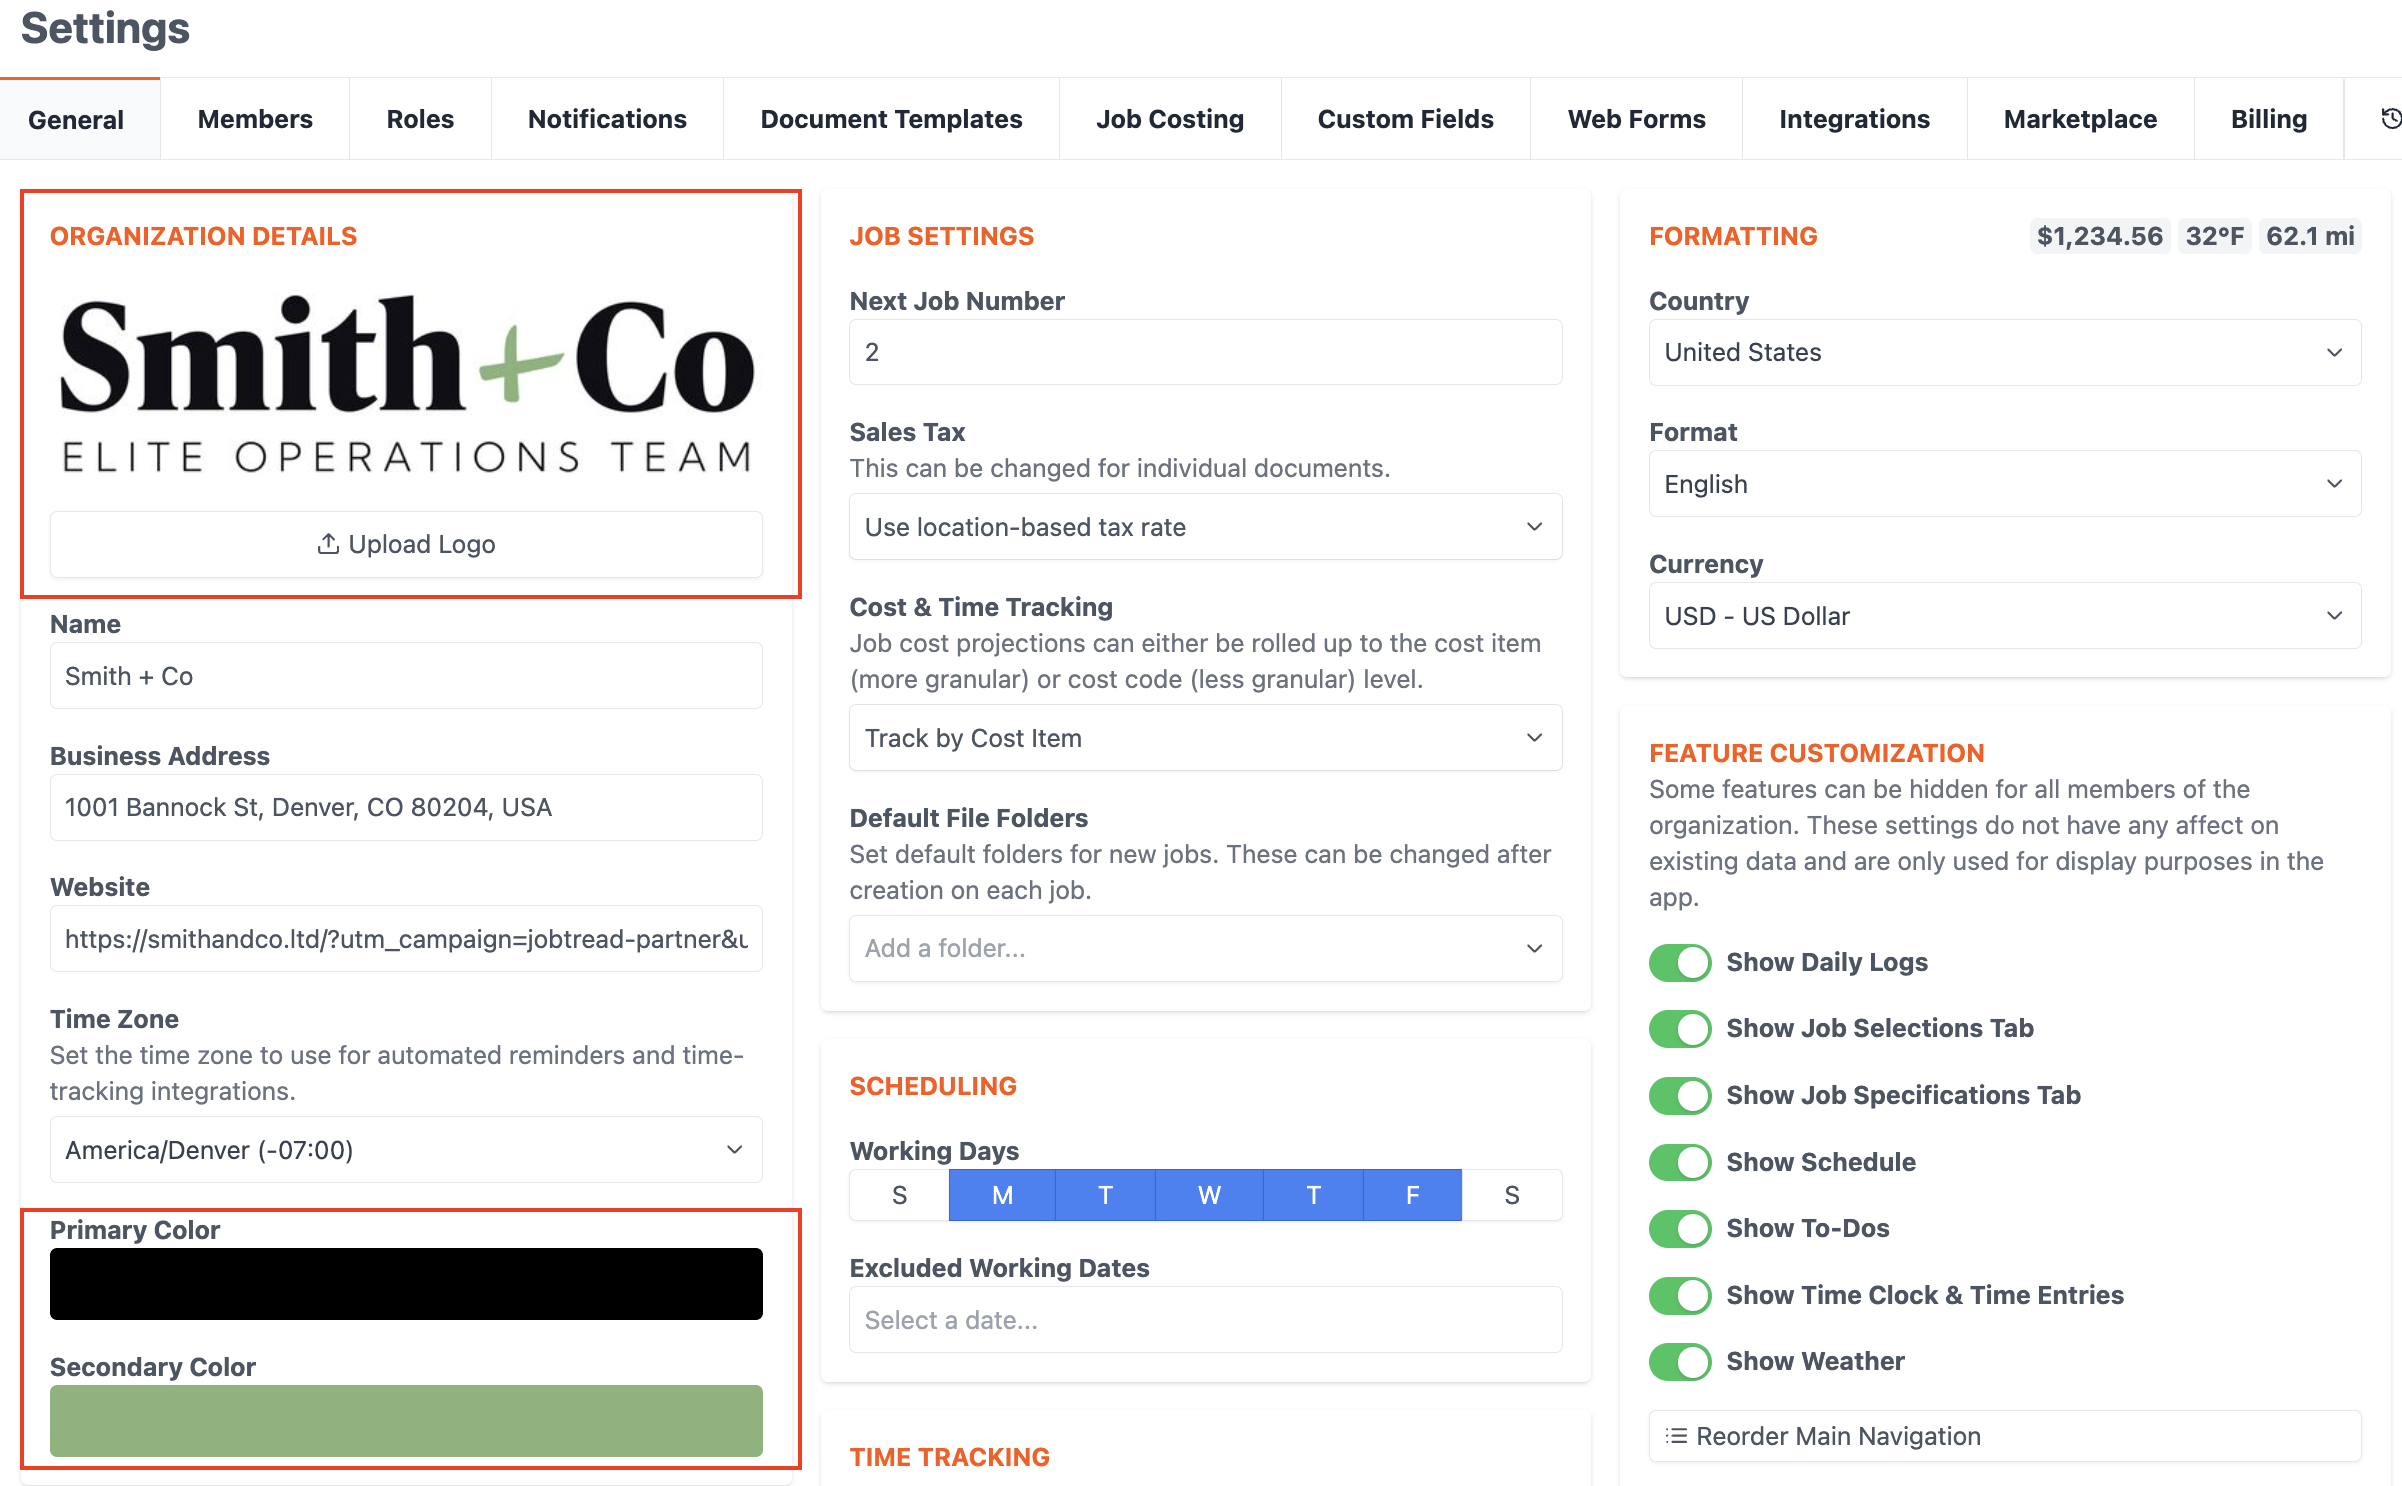
Establishing Your Branding
Before customizing specific document types, take a moment to set up your branding for a professional and cohesive appearance:
- Upload your company logo.
- Set your brand colors.
These elements ensure every document you send reflects your brand consistently.
You do this by going to your Settings and uploading your logo and selecting your default color scheme:
Exploring JobTread’s Document Types
JobTread organizes documents into five primary categories, each serving a distinct purpose.
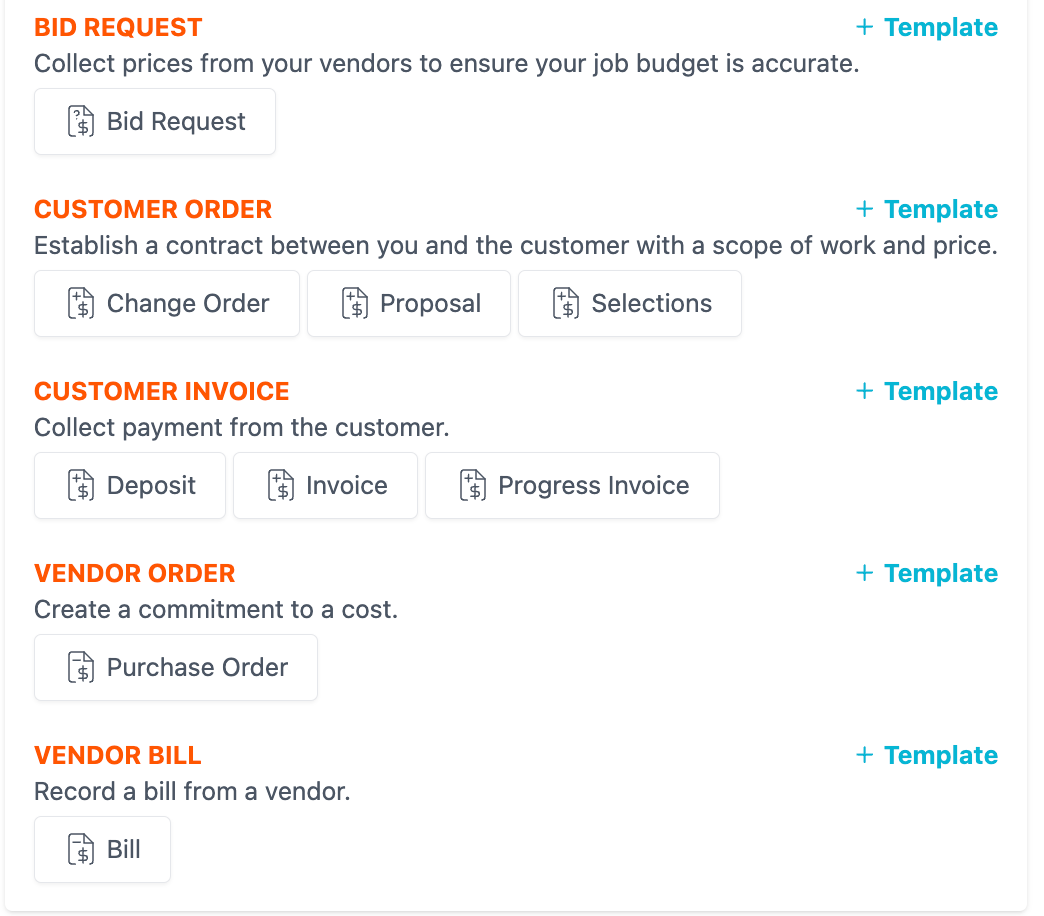
Bid Requests
Use these to solicit costs from vendors or subcontractors for specific line items in your budget. You can optionally require a signature on bid submissions.
Customer Orders
Includes proposals, change orders, and selection sheets—essentially, any document that impacts your approved project budget.
Customer Payments
Collect payments from clients through invoices, progress billings, or deposit requests. Each document ties back to specific line items in your budget.
Vendor Orders
Convert approved bid requests into purchase orders or work orders for vendors. These documents formalize your commitment to the vendor’s work or materials.
Bills
Track all project-related expenses, including receipts from vendors like Home Depot or invoices from subcontractors. Some companies also integrate lien waivers here to streamline processes, depending upon your legal requirements.
Customizing Your Document Templates
JobTread comes with pre-installed templates, but you’ll likely want to customize them to fit your specific business needs. For instance:
- A design-build remodeler might create a lien waiver template tied to a specific project milestone with their subcontractors.
- You can set up non-financial documents for customer agreements or ballpark estimates that don’t impact the budget.
To customize your templates, you'll need to navigate to the Document Templates tab in the settings menu.
- Review pre-installed templates like Bid Requests, Customer Orders, and Vendor Orders to understand their default setup.
- Modify existing templates or create new ones based on your company’s workflow needs. For example, you can add a bid request with default language that you might send only to plumbing contractors.
- Customize visibility options directly in the document preview, such as:
- Showing or hiding line item details (e.g., files, images, or quantities).
- Editing group headers and sub-item totals with the visibility toggles.
- Adjusting due dates, issue dates, or expiration dates manually.
- Deciding whether to display cost-plus details for customers or use a lump-sum format.
- Add or edit proposal details in the description section, including the scope of work or custom instructions.
- Make footer adjustments for terms and conditions, ensuring proper formatting and toggling signature requirements for approval.
- Use the recipient management tools to add or edit recipients, requiring signatures from specific contacts, and prepare documents for sending.
Here are some pro-tips we've found to be very useful.
Legal Terms in Footers
Use the footer for terms and conditions, as it’s the last section read before signatures. Use JobTread's document formatting for professional formatting throughout.
Include a signature requirement toggle to ensure agreement with the terms. Use the footer for terms and conditions, as it’s the last section read before signatures.

Modify Level of Detail
Tailor the level of detail displayed by default on documents to fit your business model. For example, cost-plus builders often show detailed line items and communicate each step of the project with the customer. Design-build remodelers may only display total costs and offer no line-item visibility.
Customize visibility for details like line items, quantities, and images in the template settings.
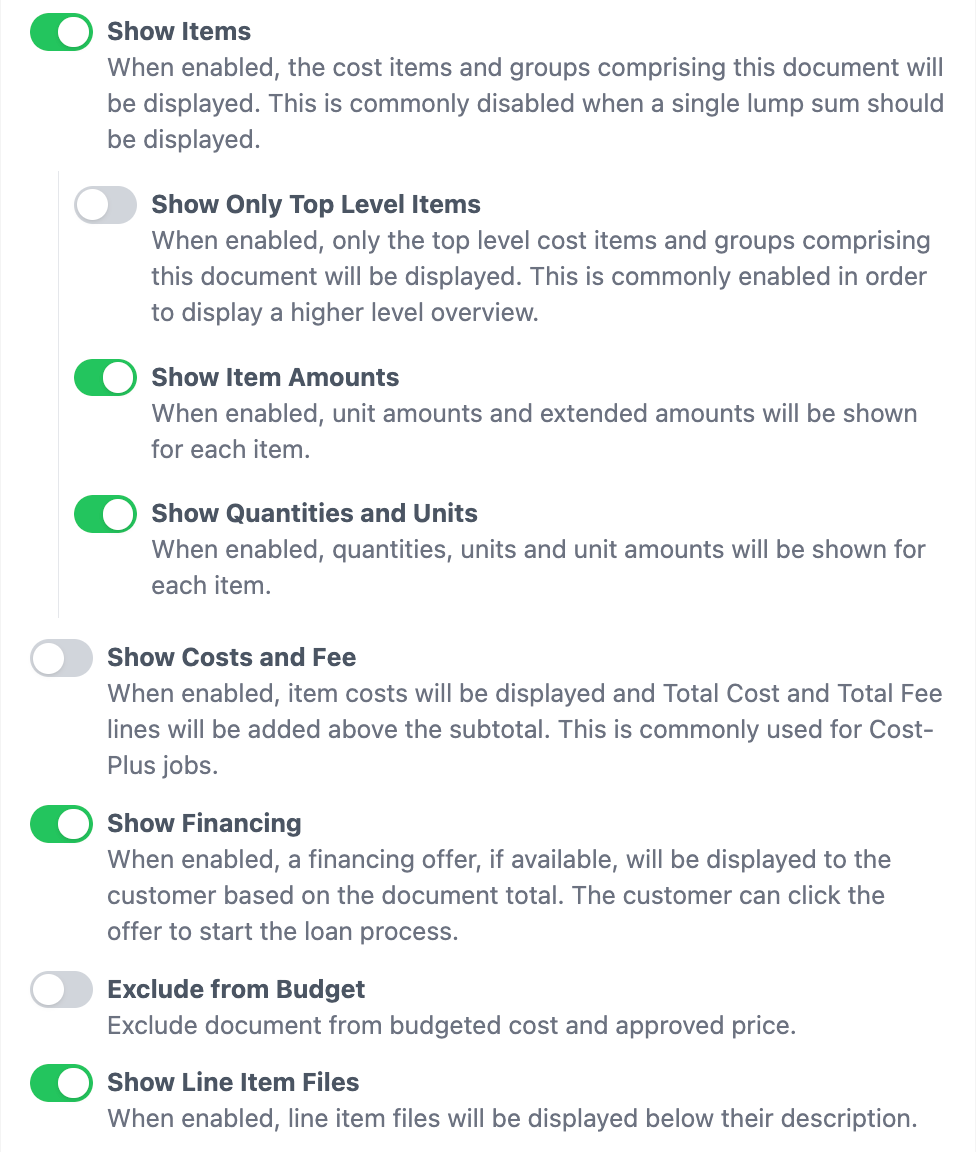
Generally, we'd recommend:
- Turning on "Show Items" if you want to show line-item detail on the document.
- Turning off "Show Item Amounts" and "Show Quantities and Units" if you don't want your customer to see unit amounts and quantities at a line-item level
- Turning off "Show Financing" if you expect customers to pay by check or in milestone payments that don't require digital financing
- Turning on "Show Line Item Files" if you expect to share photos of finishes or other items as a part of the document
Use Descriptions for Document Instructions
Utilize the description field to add clear and concise instructions or context for the document’s purpose. We recommend to avoid placing legal terms here, as they can be overlooked easily.
One remodeler we worked with decided to include bold headers for specific instructions:

But the options in this description section are endless!
Testing Your Setup
Testing your setup ensures your document workflows function as intended and prepares your system for real-world use. Below is a streamlined approach.
Test Setup
- Create a Test Job. Or, use the job from earlier setup stages as your testing base.
- Set Up a Dummy Customer. Create a test customer account you will only use for the test job.
- Set Up a Dummy Vendor. Create a test vendor account you will only use for the test job.
The contact information should be different between the customer and the vendor so JobTread doesn't get confused – but they should be internal email addresses so you can see what the emails look like.
Simulate a Project Cycle
You will want to use two separate browsers to run this test. In one, you should be logged in to your instance of JobTread. In the other, you'll use it to open links from your email so you can see what the customer or vendor sees.
- Send Bid Requests. Test sending bid requests to your dummy vendor and confirm it looks how you want it to look.
- Generate Proposal. Create a sample proposal and check branding, descriptions, and required details for accuracy.
- Generate Invoice. Create an example invoice and make sure it looks correct to the end-user customer.
- Issue Purchase Orders. Convert a bid request into a purchase order and make sure it looks/works properly.
- Log a Bill. Create a bill from the Purchase Order and confirm payment. Make sure it looks correct to the vendor.
Testing ensures your setup works smoothly, minimizes errors, and catches integration issues before they impact real projects.
Putting It All Together
Investing the time to configure your JobTread documents thoughtfully will pay off in the long run. Clear communication, accurate financial tracking, and streamlined project management all start with properly organized documents.
If you need assistance tailoring templates to your specific workflow, JobTread offers detailed support resources and video tutorials to guide you through the process. By taking these steps, you’ll create a system that simplifies your operations and sets your business up for success.
In the next post, we’ll explore how to tailor JobTread to your company’s unique workflow needs. But for now, focus on perfecting your documents—it’s the foundation for everything else.
Continue the Series:
- Getting Started
- Migrate customers into JobTread
- Migrate vendors into JobTread
- Set-up your Cost Catalog, Default Budget Templates, and Dummy Job
- Integrate with QuickBooks
- Create Document Templates and Standard Workflows (this post)
- Create Roles & Invite Users
- Test and Troubleshoot the System