
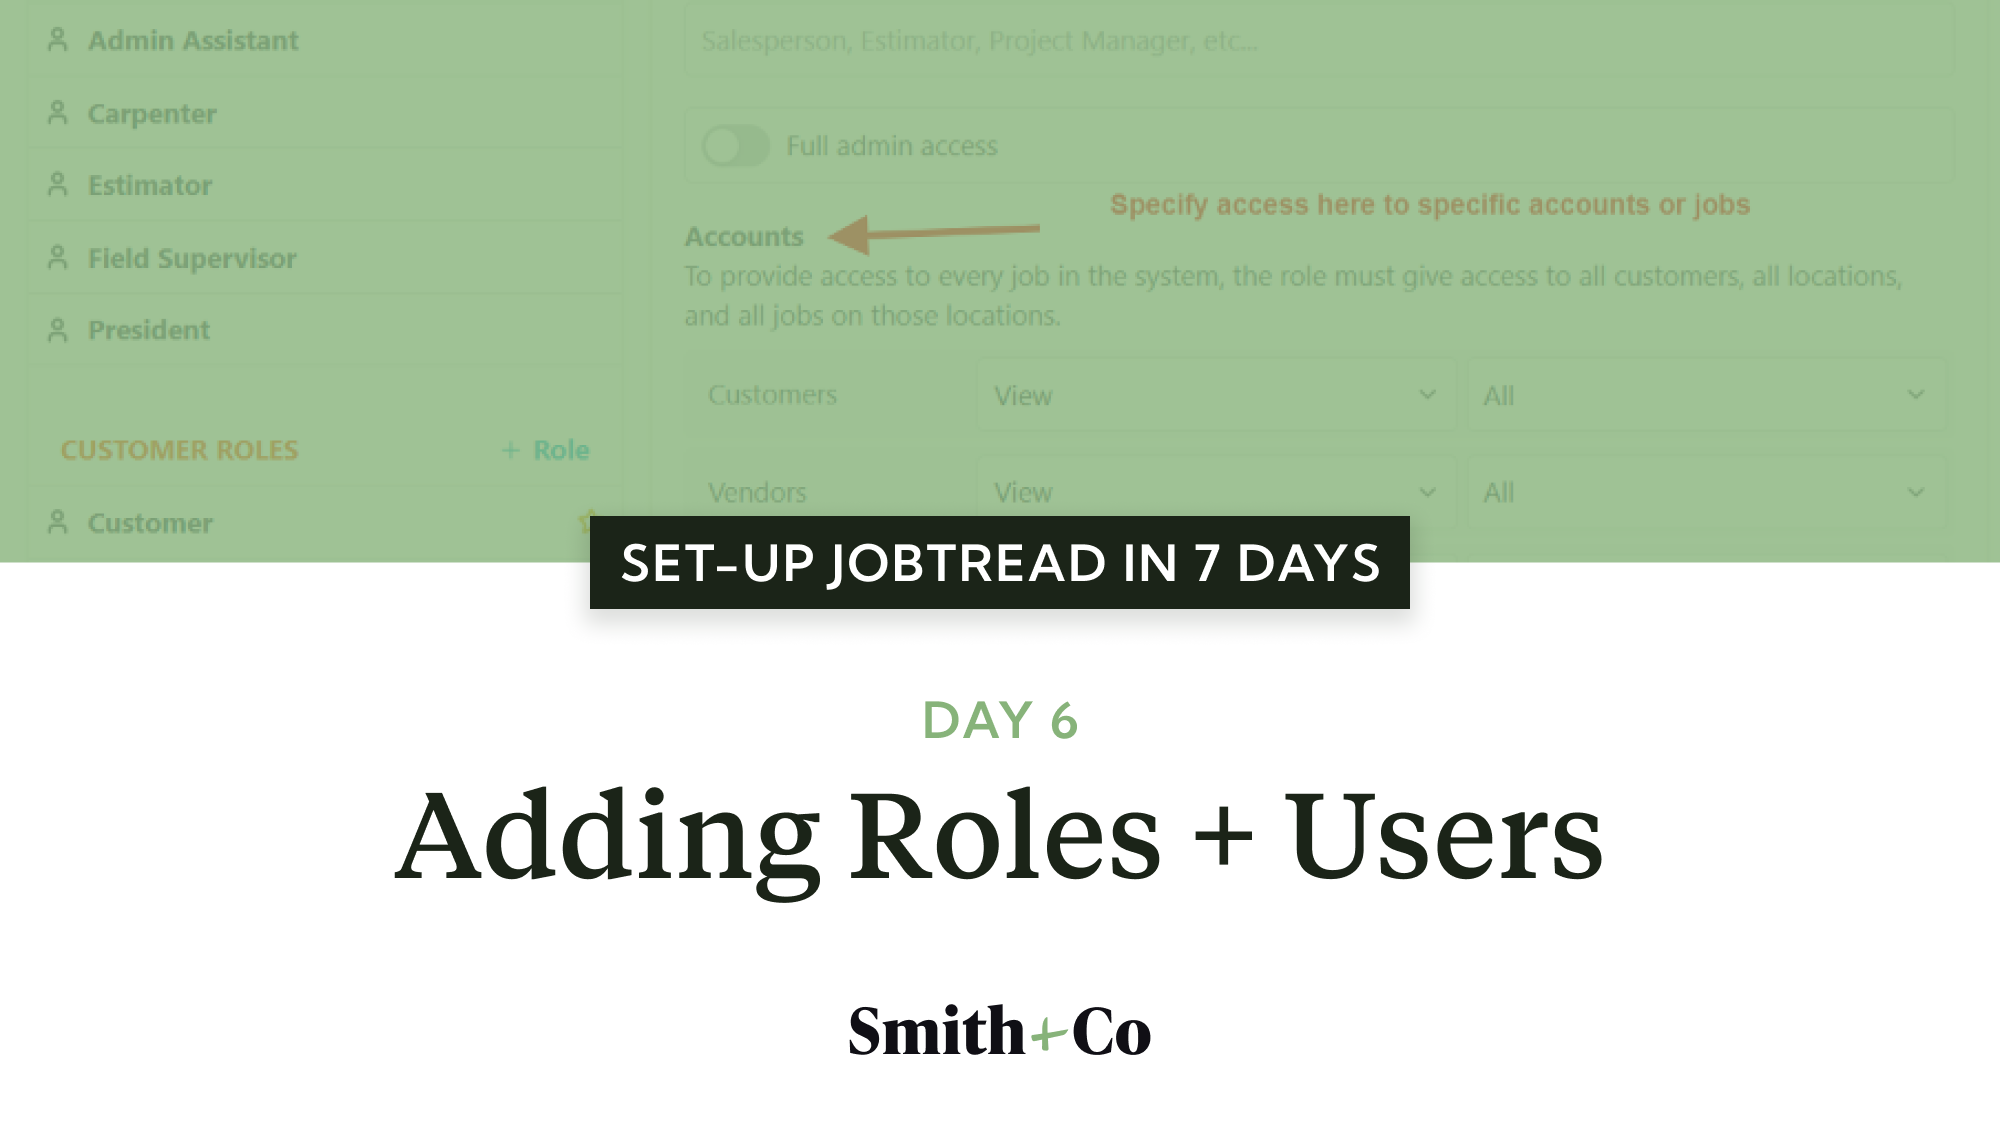
Day 6: Creating Roles & Adding Users

When it comes to managing a team in JobTread, controlling who can access and modify information is crucial. The last thing you want is sensitive financial data falling into the wrong hands or team members being overwhelmed by irrelevant system alerts. That’s where JobTread’s user roles and permissions come in.
In this post, we’ll walk through how to set up a clear, effective user management structure in JobTread. We’ll cover what roles and permissions are, how to think about configuring them, and provide a step-by-step process for implementation. By the end, you’ll have a solid grasp on how to tailor JobTread’s access settings to your team’s specific needs.
First Things First: Understanding User Types
Before we dive into the nitty-gritty of roles and permissions, let’s clarify the two main user categories in JobTread:
- Internal Users: These are your employees who need access to JobTread to do their jobs. Think project managers, field supervisors, accounting staff, and system administrators.
- External Users: These are your customers and vendors. Here’s a handy JobTread feature — external users don’t actually need to create JobTread accounts to interact with the system. Instead, they receive special links that allow them to view and take action on relevant documents. One less password for them to remember!
The rest of this guide will focus on configuring access for your internal users. But it’s good to know that your external interactions are covered too.
Roles & Permissions: The Building Blocks of User Management
JobTread’s user management system is built on two key concepts:
- Roles: Think of these as job categories that define what a user can see and do in the system. Examples might include "Project Manager," "Field Supervisor," or "Accounting Staff."
- Permissions: These are the granular settings that make up a role. They control specific access rights, like the ability to view financial data, edit customer records, or approve timesheets.
The key is to create roles that align with the actual functions and responsibilities of your team members. Then, you assign each user to the appropriate role, and voila! Their permissions are automatically configured.
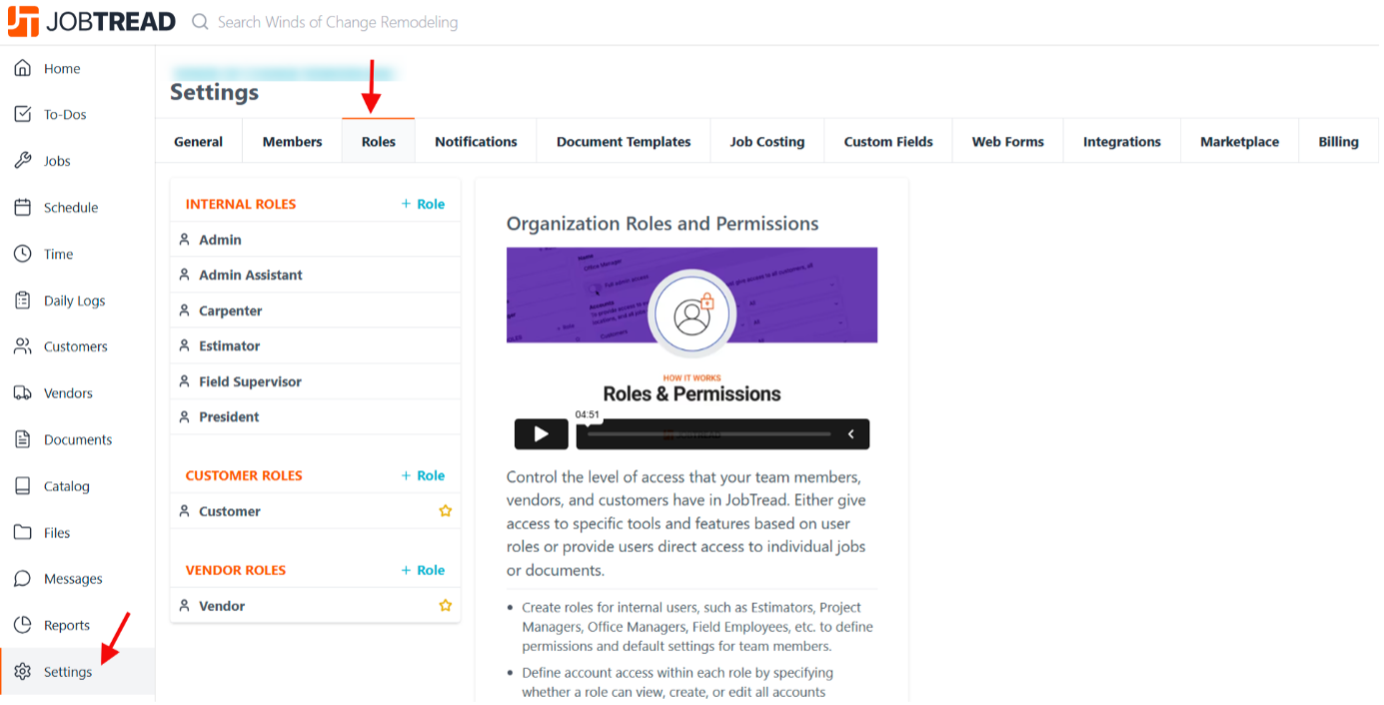
To create roles: Go to Settings > Roles and click on + Role to define a new role with tailored permissions.
Avoiding the Common Pitfall: Too Many Roles
One mistake many companies make when setting up roles is creating too many of them. It’s tempting to think you need a unique role for every job title, but that quickly gets overwhelming to manage.
In reality, team members with different titles often need similar levels of access. For example, your field staff likely need to see the same project data. They can probably share a role.
The trick is to think in broad categories first, then get more specific only when absolutely necessary. Start with the core functions in your org — maybe that’s "Field," "Office," "Management," and "Admin." Then consider if any of those need to be split out further based on actual differences in information access needs.
Key Areas to Consider When Configuring Roles
When setting up your roles, there are a few key areas you’ll want to pay special attention to.
Administrative Access
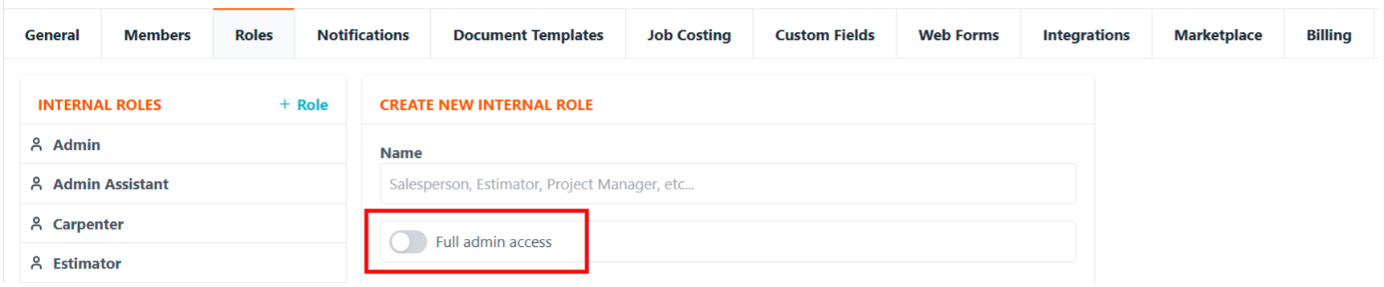
To enable administrative access, switch the toggle on Full admin access under Settings > Roles for the appropriate role. This gives users unrestricted system-wide access, including settings and billing.
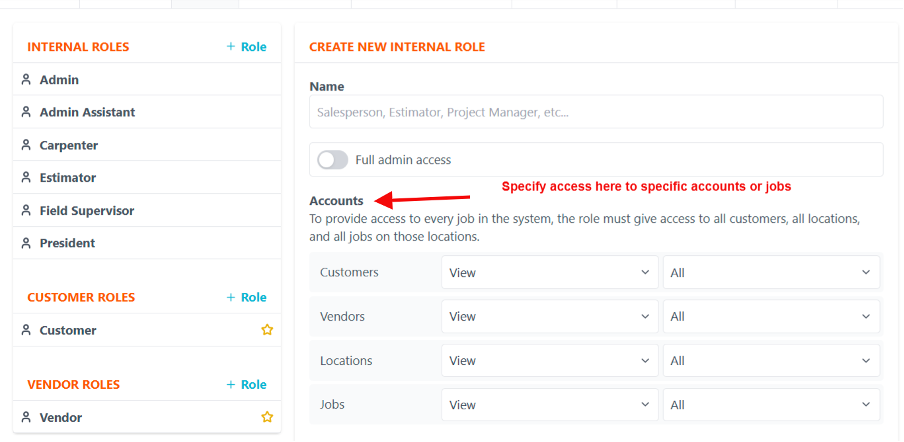
Account & Project Data
Configure whether roles can view, edit, or manage accounts and projects in Settings > Roles. Specify whether users should have global access or be limited to specific accounts or jobs.
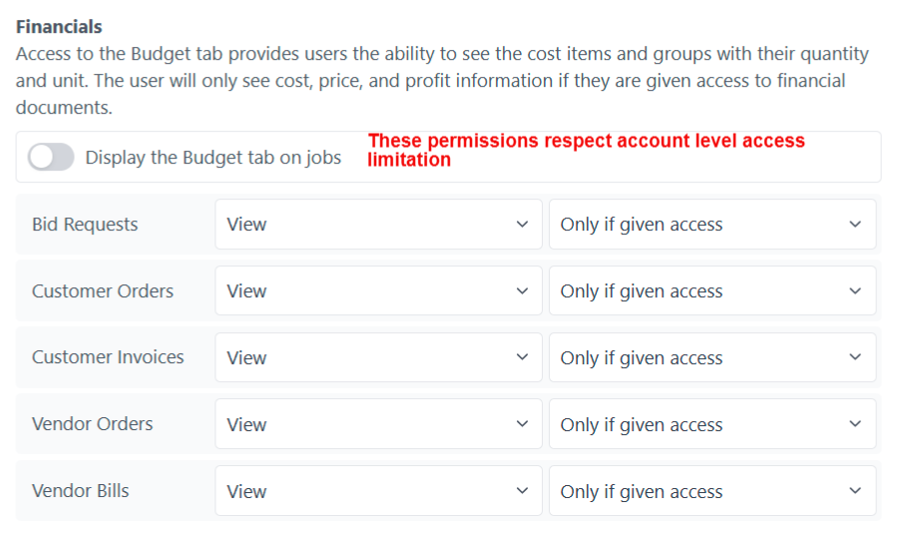
Financial Information
Adjust financial permissions like viewing budgets or managing invoices. JobTread is smart enough that if you remove them from an individual account (such as a customer or job), it won't let them see the data, even if they're "supposed to" according to their permissions.
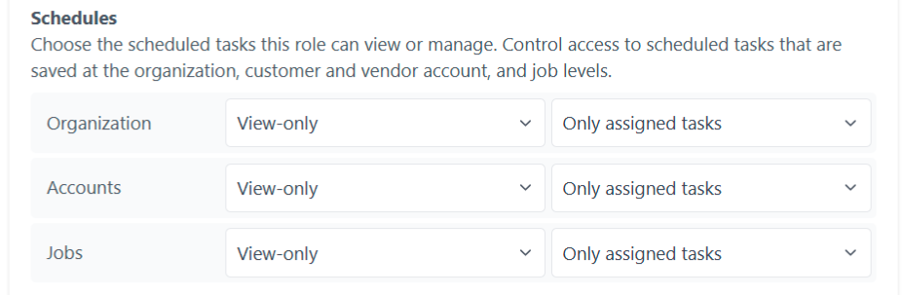
Scheduling & Task Management
Define whether the role can view, update, or create scheduling tasks.
Since you can create schedules for specific jobs, specific customers or vendors (which JobTread groups together as "accounts"), and for your entire organization, you can be very granular about what kind of information they have access to.
Generally: field staff members should be able to update only assigned tasks or tasks in the entire schedule.
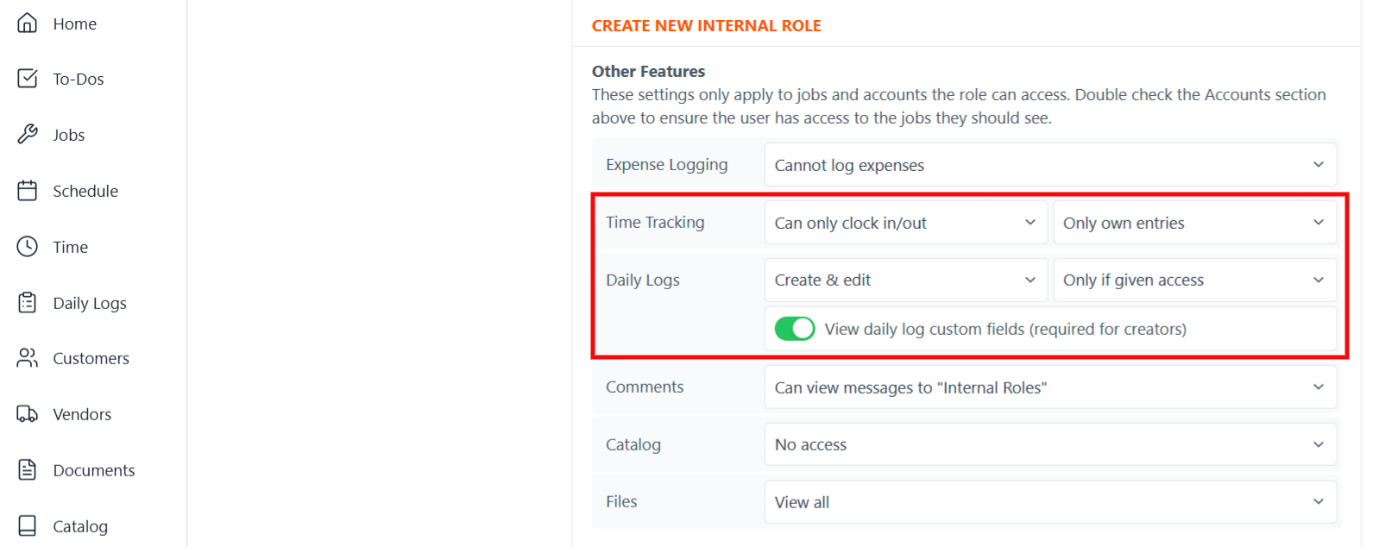
Time & Log Management
You can control whether they can clock in/out or modify their time entries after the fact. This is very useful if you want managers to review time entries, or limit a staff member's ability to change their own time entries.
Similarly, you can limit whether they can create daily logs or edit others.
Catalog Access
As pictured above, you can also limit staff member's access to catalog data. If they have no access, they will not be able to access cost data on any job. You can also limit their information to different levels of access (such as only cost information, and not the price you're charging the customer).
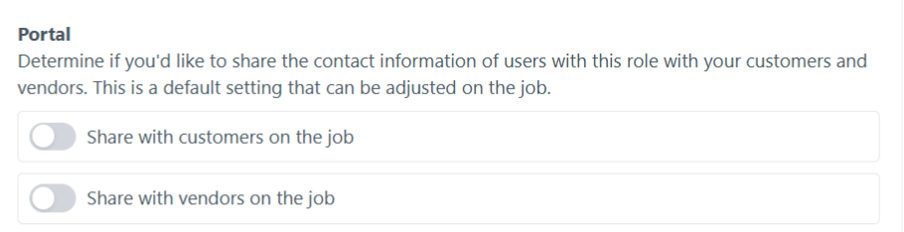
Portal Visibility
Finally, you can share the role's information on the job page by default. This is helpful if you have field supervisors or company leadership who should be visible to clients or vendors when they log-in to their portal. You can similarly hide other staff by default, like your office staff, even if they have access to the job.
Setting Up Notifications: Finding the Right Balance
During your launch setup, it’s more important to get the basics right instead of worrying about perfecting advanced features. Notifications are no exception. You can always adjust these later if your team is receiving too many alerts or missing important ones.
At a minimum, consider enabling notifications for documents, daily logs, and tasks. These help your team stay in the loop without becoming overwhelmed. Ask yourself:
- What events are truly essential for this role to be aware of? Examples include document submissions, task assignments, time entry approvals, or major project updates.
- What’s the best channel? Should alerts come via email, mobile push notification, or both?
Start simple and expand based on team feedback. The key is to keep everyone informed without creating notification fatigue.
Step-by-Step: Implementing Roles & Permissions
Now that we’ve covered the main concepts, here’s a quick roadmap for setting up your user management in JobTread:
- Go to Settings > Roles to identify your core user categories and create a role for each.
- Configure permissions for each role, focusing on the key areas outlined above.
- Set up essential notifications for each role in Settings > Roles > Notifications.
- Add your individual users to the system via Settings > Members Tab > Add Member.
- Assign each user to the appropriate role by selecting the role during setup or by editing their profile in the Members Tab.
- Test thoroughly to ensure permissions and notifications are working as expected. Encourage users to log in and provide feedback.
- Verify external user permissions by clicking the eye icon next to their name in the Members Tab to preview their view of the data.
- Gather feedback from your team and adjust settings as needed.
By starting with a thoughtful but streamlined setup and iterating based on actual needs, you’ll find the sweet spot: a user management system that empowers your team while keeping your data secure.
If you hit any snags along the way or have questions, don’t hesitate to reach out. Happy configuring!